I was lucky enough to be chosen to attend a 3- day pilot workshop for Sarah Veblen on draping on the dressform. This review is a non- biased review, as part of the pilot class all participants paid for the class and feedback on all aspects of the hands on class/workshop was done after the end of the third day.
The workshop title is: Fabric + Dressform: A non-prescriptive approach to draping.
 |
| L-R Sarah Veblen, Monica Walker, Steph King (me), Liz Cohen and Wendy Grossman |
There were 4 attendees, 3 with customized dress forms to meet our body sizes and 1 with a generic sized dress form.
Sarah had a class outline that she followed to guide us through the 3 days and at the end of the workshop we had a focus group meeting on what we liked, didn't like and suggestions for changes. All of Sarah's workshops follow a similar approach and this one was no different.
Each morning we gathered together to talk about what will happen for the day, discuss expectations and thoughts and Sarah reviews the techniques and ideas that she expects us to achieve and learn during that day's exercises.
One of the most important lessons in this workshop is understanding grain. Lengthwise (warp), crosswise (weft) and bias grains are extremely important, as well as knowing how to grain up your fabric. For most of the workshop we worked with muslin fabrics. We started out with graining our muslin and then gridding it up. I must admit that at first I was thinking oh what a bore, drawing a grid on every piece of muslin. However, it really drove home the importance of knowing exactly where your grainline is and how you are using it in designing garments.
 |
| Sarah discussing the importance of grainlines and gridding up your muslin for the draping process. On the right she demonstrates how to anchor straight of grain at center front and the process of draping the front bodice. |
Day 1: Morning group discussion and round table on the importance of grain lines and how to grid up our muslins.. Once our gridded muslins were ready we moved onto draping on a mound.The first exercise was draping darts on a bodice front on our own dressforms. The exercise entailed anchoring the center front on the lengthwise grain, smoothing the fabric all out and seeing where the excess fabric moved to and form a dart in that place. Followed by moving the fabric around and creating darts from any seam line to the apex. From shoulder, neckline, armscye, side seam, waist seam and center front and then move to any combination or multiples of these darts. I started the exercise with a side angled dart that I know works on me and then had fun just playing around. My morning ended up with a bodice front with several radiating darts.\\
At various times throughout the day Sarah would stop us and explain different ideas and methods. One that stuck with me was how to think about how you would incorporate the draped elements into an actual garment. Asking us to keep the darts, tucks, grain lines that we created in the same direction as if they were actually being sewn. I found it interesting that once I started to think about construction as well as design my fingers automatically wanted to manipulate the fabric in the correct way.
 |
| Sarah observing Wendy and Liz as they work on their bodice fronts. |
Day 1: For the afternoon we continued to play on our own dressforms. I moved to draping a back bodice piece to go with my front bodice. I came up with a pleasing back bodice and Sarah gave me a critique that had me thinking about how to really drape it to take into account the front bodice. For example, thinking of the grainline that I had for the side seam on the front bodice and how to incorporate that into the back bodice. Thinking about if the grains were different how would that affect the seam and the drape when the pieces came together in construction. It was at this point that I had a wonderful
aha moment. It was liked it all just clicked and I couldn't move my fingers and hands fast enough to get the new design draped on the dressform fast enough. I finished day one feeling exhausted, excited and with many ideas in my head.
 |
| My final outcome of Day One. A bodice front with 4 inferior radiating darts and a bodice back with multiple waist fitting darts. The front and back grainlines match at the side seam for a pleasing look. |
Day 2: We spent some time gathered together reviewing what we had learned the day before. Sarah reinforced the ideas about draping on the form, letting the cloth talk to us, loosening up our hands and giving ourselves mental room for creativity. For our first exercise she asked us to move to the next dressform counter clockwise to our own and had us drape a bodice front only going to the waist and then if time allowed, a bodice back on our neighbors dressform. The main idea of this was to get us out of our own heads and to remove pre-conceived notions as to what we thought would or would not work on ourselves. It was a great exercise! I did not realize how much the knowledge of my own form was influencing me until I moved to Wendy's dress form and then just truly played!
 |
| Wendy having an aha moment during one of our group discussions. Love when those happen and it can be shared in a group setting! |
 |
| Sarah demonstrating the draping of a straight skirt on Gigi. |
The second half of the morning was spent working on a skirt back. Sarah started with a demonstration on Gigi, her half scale model. The starting point for this exercise was to keep the side seam and the center back seam on grain and play with darts to take up the excess fabric going into the waist. It was interesting to see how the fabric behaved as I tried to play with alternative dart styles as well as incorporating the darts into seamlines. Everyone came up with some very interesting ideas, some better than others, as you can see in the pictures below!
 |
| Draping of a straight skirt back on my dressform. Left is with a single dart that produces an ugly point and the right has the fullness split into three smaller darts for a very smooth silhouette over my tush. |
 |
| In these photo's I was playing with incorporating the dart into different seam lines. I like the design on the left much more than the one on the right. However, both designs achieve a smooth silhouette. |
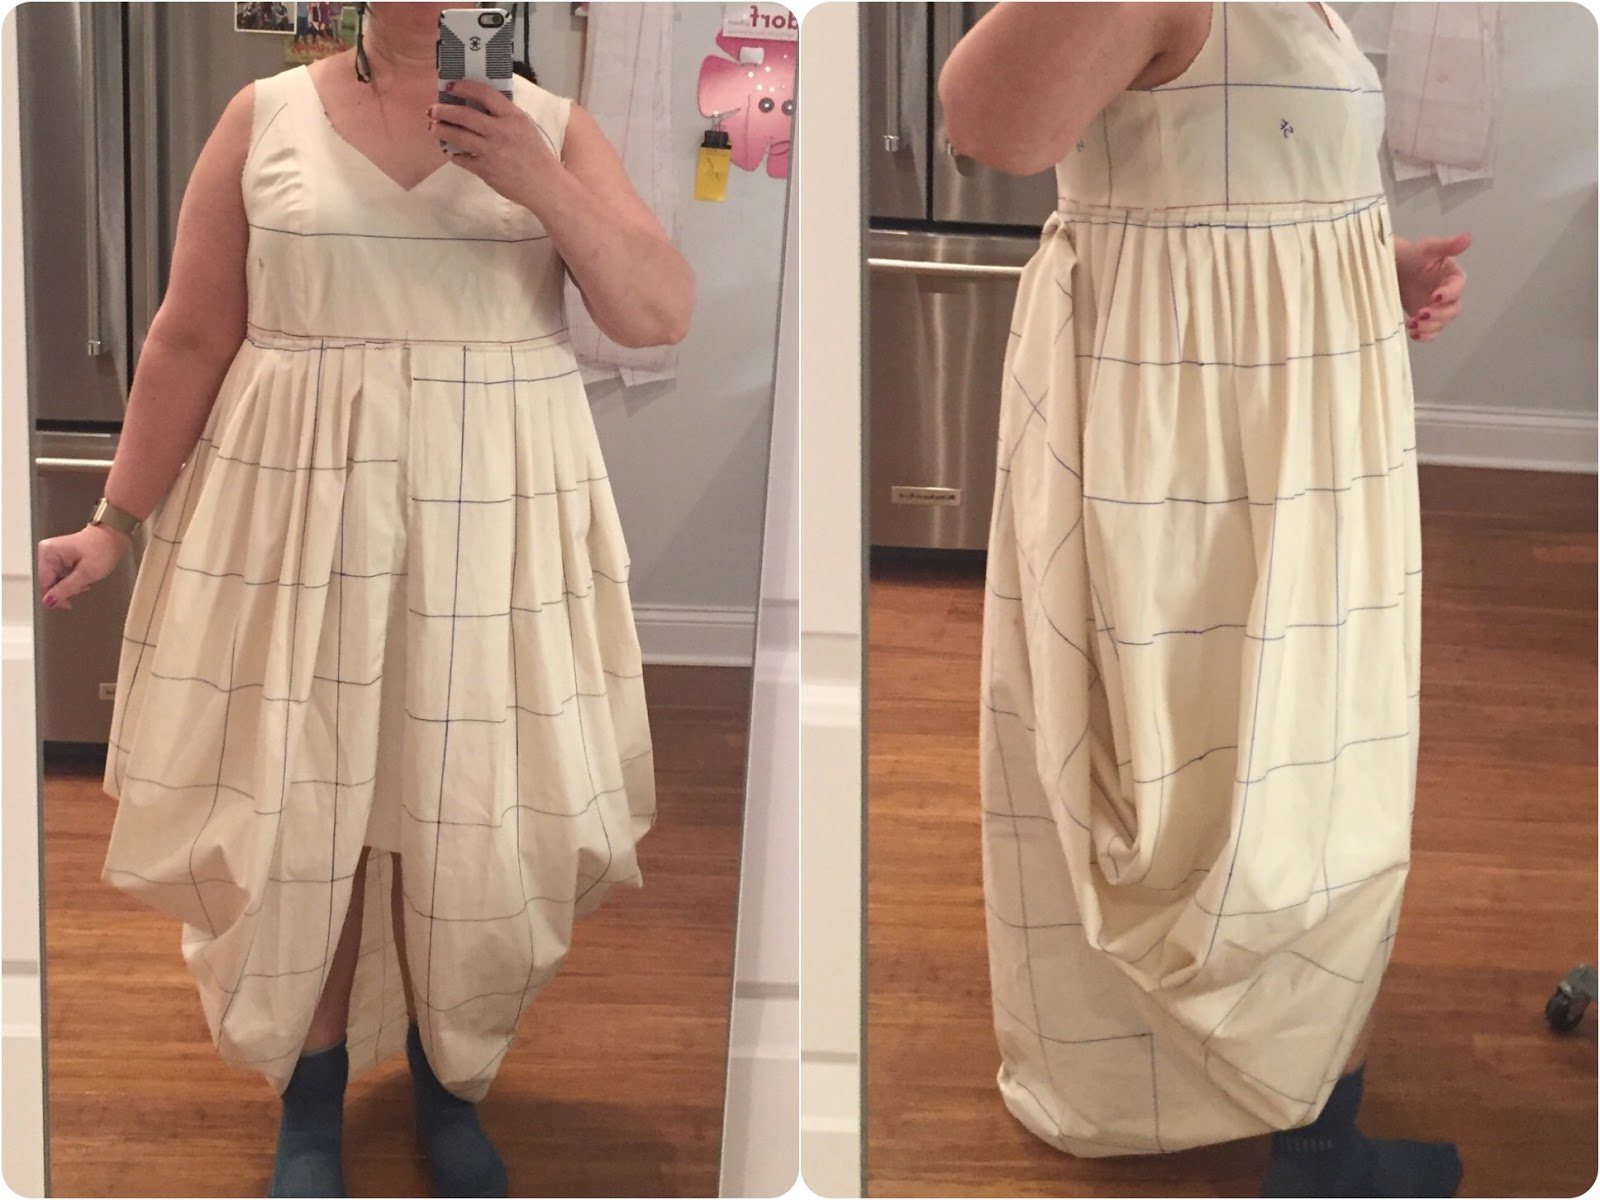
Day 2: Afternoon was spent playing with bias. We started with using the regular muslin and draped a skirt. Oh Dear.... I quickly learned why Sarah had us bring a drapey woven to use for bias exercises.
The difference in a skirt front draped in a traditional muslin fabric versus the rayon challis was quite significant. I found that I needed to work a bit harder on letting my creativity flow when we started working on the bias. I was not overly excited by the first couple of ideas that I draped. However, I was very interested to see how the fabric behaved on the bias and that by just changing how you pulled up on the fabric, for a skirt, you could change how the fullness was directed. This was a lot of fun to experiment with.
 |
| The first bias exercise was using regular muslin that does not have much drape. You can see how it gives a very full silhouette that I do not particularly like on me. |
 |
| These photos show the use of a much more drapey rayon challis used on the bias. I love how you can control the fullness and the area of drape just by adjusting the pull on the cloth in different areas. The left picture has more drape at the center and the picture on the right has the drape spread out to the sides. |
 |
| Here I played with what I always thought of as 'draping', a very greek goddess type of skirt. |
Day 3: We started the morning off with a round table discussion on ideas that we each had and what we wanted to accomplish on the last day of the workshop. Sarah then assigned each of us a 'client' garment. I had to create a bodice and skirt for Liz and Monica had to make a bias bodice for me. I had to make sure that I had the proper amount of ease in the garment and that it would be something that my 'client' would enjoy wearing. I ended up designing a peplum type bodice with release tucks that managed the fullness at the waist without being too constricting or tight. Then I added a simple pegged pencil skirt and my client was thrilled! I hope she decides to make this into a flat pattern and mock it up.

Liz was my client for the first exercise of day three. I had to create a bodice front that she would like. After speaking with Liz I know she likes much more ease in her garments but doesn't necessarily want them baggy. I decided to make her bodice with double ended release pleats to control the fullness and give her shape. I then added on a skirt as well to complete the look. I found that I really enjoyed this process of designing for someone else with a very different body type than mine!
 |
| Here are a couple of examples of the lovely work done by Monica! The bodice on the right is done on my dressform, I was her client for that exercise, I saved it as well as one that Wendy did for me. Plan is to transfer them to flat pattern and make a mockup. |
We had a special visitor on day 3! Princess Victoria joined us for lunch and she was very interested in what we were doing. So interested in fact that she joined in on the draping fun!
 |
| Princess Victoria came for a visit to the workshop on day three. She was enthralled by the dressforms and the cloth. Sarah and her had spent a few minutes pinning and draping a new design,Victoria loved it! Sarah has inspired the next generation of designers! |
Day 3: Afternoon was spent playing with knits, more bias and inspiration photo's. This really was a time for experimentation and for us to ask Sarah questions and bounce ideas off of each other. I finished up the workshop with several draped muslins that are marked and ready to be transferred to flat pattern.
 |
| For this exercise I was playing with knit on the bias. As you can see on the left the tucks are placed at an angle across the body that looks awkward on my dressform. I took the time to really work the design and added many more tucks and changed the placement line quite a bit for a very pleasing look. Here it is in a dress length, I also shortened it to a tunic length and really loved that as well. |
 |
As we came to the afternoon of Day three, Sarah gave us some free time to work on anything that we wanted. I choose to use this inspiration photo to see if I could re-create this lovely top. Sarah took a few minutes to show me how to determine how the top was most likely made by looking at the grainline of the pieces, sketching over them on a clean sheet of paper and then deconstructing them using my own knowledge of dressmaking and construction.
From that point I was then able to take some muslin and drape my dressform in a similar fashion and to my great surprise I was able to recreate it fairly well! In the photo below you can see my draped bodice. |

After the end of the workshop the five of us sat down and had a roundtable discussion about every detail of the workshop. What we liked, didn't like, what additional information would be good to have ahead of time, pre-requisites for the attendees, et cetera. Some of the feedback was directly from questions Sarah asked us around content, length of workshop, ratio of time spent working on dressforms vs discussion time as a group. My number one item for feedback was to make sure that she added to the workshop description that this class requires comfortable and supportive shoes. While working at the dressforms you are most often standing and this can cause some physical exhaustion.
I highly recommend this workshop to anyone that has a dressform or access to a dressform. Learning how to use my dressform to drape designs has added an invaluable tool to my toolbox of sewing, design and construction. to drape designs.
For a full list of Sarah Veblen's workshops be sure to check out her website
SarahVeblen.com or click
HERE for a direct link to her hands-on classes.
There are many ideas that I have sketched out and many designs that live in my imagination and I now have a means to play with those ideas without having to first go to flat pattern. I can quickly drape in an idea that I am thinking of and see how it will work. An excellent tool that I am looking forward to implementing.
 |
| I leave you with this last example of a bias piece of drapey cloth, Rayon Challis on left and silk burnout on the right and how I used horizontal tucks to control the fullness. The inspiration for trying this technique came from the Charles James dress pictured below. |