Tuesday, December 22, 2015

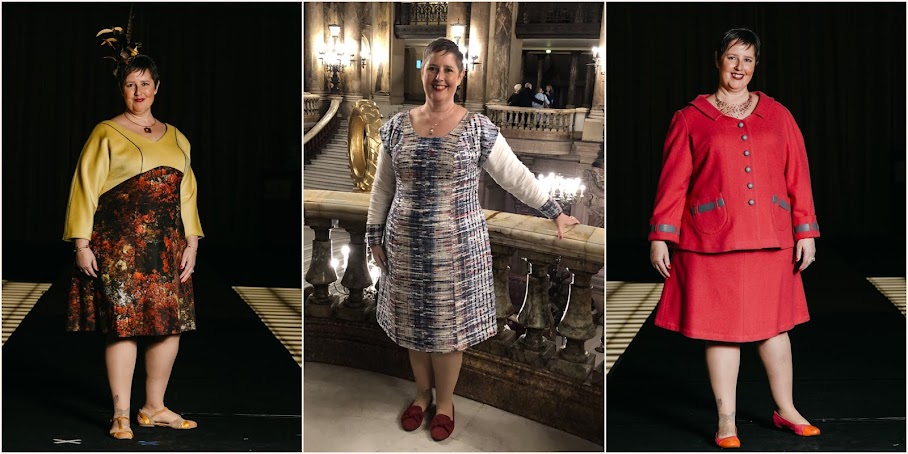
A trio of knit dresses, adventures with the Cashmerette Appleton!

It is very rare that I repeat the same pattern 3 times in a row in such a short period of time! However, I just fell in love with the Appleton dress. 
The checked version was my muslin. I used a very inexpensive sweater knit from JoAnns that had similar stretch qualities to my fashion fabrics. It turned out well enough to keep as a wearable muslin! Yay, love when that happens!! I have no visions of this dress lasting for years and years. The fabric is not the highest quality and will surely pill quite badly, which is why it was used as my muslin. With that said, I will enjoy it to its fullest while it lasts.

So, why did I make 2 more versions? Well, I simply could not decide on which fabric to use!! So I cut both out at the same time and sewed them up at the same time with black thread in my sewing machine and serger. Not having to change thread colors helped to simplify my decision to do both.

The second reason for making both was purely a factor of comfort and fit. With the Appleton being a full wrap dress the fit is forgiving as I lose weight and comfortable with regards to my abdomen. Fact is I am steadily losing weight with my current pancreas issues and pants with waistbands and more constricting garments can be quite uncomfortable. Although, I have lost enough weight that all my jeans are loose enough to not bother me. I'm trying to stay positive and look at the positives of the weight loss. Soon, I'll have this health stuff all managed and I'll go back to having to work my ass off to lose even an ounce!!

I digress....
Back to my dresses.
Pattern: Appleton by Cashmerette. Comes in sizes 12-28 with 3 different cup sizes c/d e/f g/h
I cut a size 20 c/d from the upper waist and up and to a 24 from the hips down with a nice blend through the waist. 
Fabrics: 
Blue watercolor double faced ITY knit from fabricmart- 100%poly
Electrical Storm Knit, a super soft French knit from Smugglers Daughter- 96%viscose 4%elastic
Black/Brown checked sweater knit from JoAnne super sale table- Unknown likely polyester

Each fabric gives a different look to the dress.

The electrical storm version is probably my most favorite. The fabric is divine and so soft and it's like being wrapped in the sweetest hug! Ahhhh. 
The checked muslin version bugs me because of not having enough fabric to match at the side seams. It's a great dress to throw on, feel comfortable and warm, and go chat with girlfriends.
The blue one is interesting to me, the fabric does not have as much stretch due to being a double faced ITY. You can see this in the pull lines at the side boob area. With the less stretch it feels more like a formal dress to me. Also the vertical wavy lines make for interesting optical effects.

I washed and dried all 3 on delicate before sewing up and after creation have been a red with cold delicate washed and line dried. It's nicer to these fabrics to keep them out of the drier.

So what are my likes and dislike of this pattern?
Likes:
1. I did not have to make my normal pattern adjustments. Most notably my back closed wedge adjustment or as many people call it a sway back adjustment. I don't really have a sway back rather I have a big butt! Those with this trait have an issue with fabric pooling in the lower back just above the butt. 
2. The second adjustment I usually make on surplus dresses and tops of both wrap and mock wrap type is to shorten the front edge to eliminate gaping and to raise the cross area. I don't need super cleavage! I did NO pattern alterations. None at all!
3. I also love the depth of the wrap! No insecure feelings of uh-oh I'm gonna flash the world. It's a good thing! 

Dislikes: I really did not have any. I think you need to pay attention to the area where the ties meet the neck binding and make sure everything lines up or else it could look a little messy once you apply the neckline/tie piece. 

I have already worn these dresses several times! They were a perfect add to my wardrobe for the holidays! 
The blue one was worn to my ASG neighborhood group Holiday brunch and to a work recognition dinner. 
The black/grey one was worn to the opera and to my husbands work holiday party. 

I really love the fact that they can be dressed up or go more casual just with the change of accessories.

This pattern will be put away for a while. Thinking I may visit it in the late spring when I need a warm weather dress. I think it will be darling in short sleeves in a fun summery print!

Next up on the work table a sequin top for my birthday/NYE get together. I've never done much with sequins so this will be an experience!

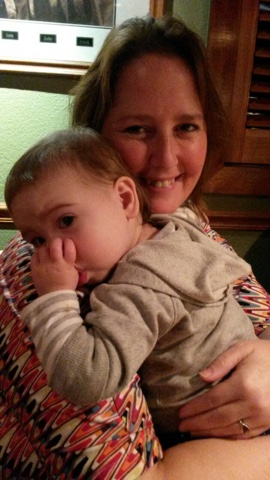
Hugs from Princess Victoria! Hard to believe this little angel granddaughter of mine will be 18 months on Christmas Eve! 

Friday, December 11, 2015

A trip to Les Fabriques and a new top, McCall's 6963


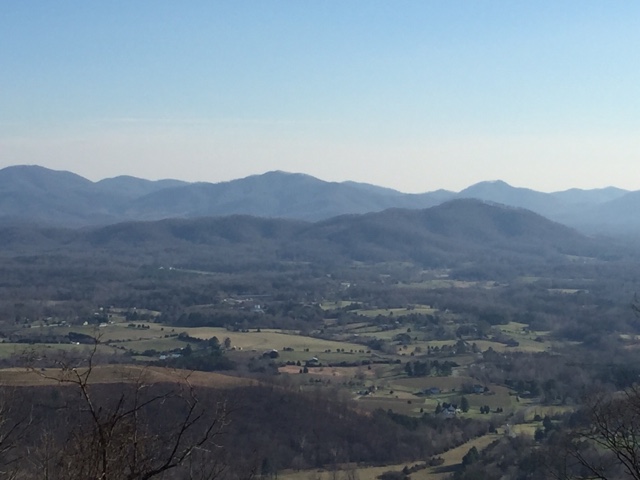
I had a quick trip this week down to Fisherville, VA. Think southern Virginia right smack in the middle of the Blue Ridge Mountains. Beautiful area, stunning blue-grey mountains layered upon each other with a softness about them that you just don't get in the western US. 

My meeting finished up by 2pm and my flight home wasn't until 6:30. A little research was done as I grabbed a bite to eat that turned up an eclectic looking fabric shop in the town of Charlottesville, just a few miles from the little airport. Armed with my GPS and a couple hours to spare I headed to Les Fabriques. 

The store was comprised of a fabric shop with a great variety of specially curated fabrics. Think a little bit of everything with all of it being high quality. There was also a large selection of vintage patterns, think patterns that have been picked from garage sales and estate sales. Everything from vintage woman designer vogues to great 1950's children's pinafores. Rounding out the shop were a beautiful selection of notions and buttons, again quality was abound in all the products. 

At the end of the shop was a small resale shop area that had a great selection of clothes and handmade jewelry. 

The almost haphazard way the fabric was strewn on the periphery shelves was very charming and invited you to touch and pull out fabrics and pet and feel them. I took my time and took it all in, such a pleasure to have time to browse and peruse the goods. 

I ended up leaving with 2 cuts of fabric, how could I not?!?  After all, there was a 20% of everything in the store ale happening for the holidays! 
I purchased one yard of this mat bronze sequined fabric! So pretty... Maybe a new top for my birthday!
The second is a beautiful silk that was priced at 36$ a yard but since it was an end cut with only four yards left they gave it to me for 64$. The best part was, I had no idea that it was on sale! The colors and print and feel of the fabric just grabbed me. They had a roll in a purple color way as well but that one just looked a bit more harsh! 

Late last week I finished up a new top. Having been sick I needed to work on some comfortable and easy fitting projects and I kicked off on an unplanned knit fixation! I will get back to my previously scheduled works this week!

Along my diversion into knits I wanted to use this double faced 2 way stretch ITY knit. It has been marinating in my stash for a while and the fabric closet had spit it out for me to use! I had 3.5 yards enough for a dress (to yet be blogged) plus this top.

Last winter I made 2 versions of this top, one very similar to this one with a deep cowl and long sleeves but in a lightweight ponte and one with long sleeves and a higher shallower cowl out of a weird nylon double knit. I like the fact that even with the deeper cowl you can lean over, bend and pick things up and not necessarily flash all of you r boobs to everyone around you!


I like this top and I wanted long sleeves. Actually I wanted extra long sleeves, sometimes I like the feel of the fabric pooling slightly at my wrist. Especially in the winter! Looking at the photos the sleeves look a little long... And this is why I love to sew!!! I can make them exactly how I want them.

This top is multi purpose. I can wear it as shown in these pictures as a casual wear. I can also wear it belted with a cardigan over it with a skirt to make it business casual .  Good versatility! 

So when do you consider a pattern to be a t-n-t pattern? I have this pattern with all adjustments made so I can just pull it out sew away without much thought to fit. I think with knits you have a leeway of weight gain/loss before you have to reassess fit. Of course you always need to keep in mind the type and stretch of the knit. I used my tripod and wireless fob to take these pictures and being too lazy to check anything but the first picture for frame and focus I realized after I put everything away that the photos from the back look like crap. I didn't straighten out the top at pull it over my bum hence it looks a bit wonky.  Part of that has to do with my generous bum, if I want something to stay down over it all the time it needs to be more of a tunic length versus a top ending at the high hip. 

I think I need to write out a cue card checklist to keep with my camera setup. 
- smile, I always look so serious like I'm sending mental brainwaves to the camera to please work as intended!!
- straighten the clothes out
- stand up straight
- check all photos before changing outfits or putting all the camera crap away!

Happy Sewing!!!

Family day at the Field Museum! 


Friday, December 4, 2015

2 happy versions of Vogue 1336!

Vogue 1336 a super fun dress!!!

This dress started as my dress for the Chicago Haute Couture Club November challenge of Modernize your Mondrian. In this challenge we needed to update the look of the original YSL Mondrian dress and give it our own spin. The only stipulation was that it had to have the black lines and these could be done by any means that we wanted.

The black version of this dress started out as the muslin. However, I loved it so much that after I made my fitting changes I recut the pieces that needed to be changed and added the orange border and sleeves and just love this dress! 

Let me talk about how I decided to update the look of the original YSL Mondrian. 
- update the fabrics by going with rayon blend ponte knits
- updated the color palate from the original primary colors
- color placement to flatter my figure. Darker colors around the waist and hips with brighter colors at bust and face and bottom panel. 
- used narrow strips of black ponte as flat piping for updated narrow black strips. 

The pattern, vogue 1336, Is a Sandra Betzina Todays Fit pattern. It already included some of the pattern pieces for the color blocking. I just took it a step further. When I made the black muslin for fitting I used HBLs or horizontal balance lines to make sure that the dress was hanging properly on my frame. As suspected, I tuck a wedge tuck from the back and added an open wedge to the front. I also adjusted the side seams. I played with the idea of adding some sort of darts to the bust area but the way the sleeves and side seams were shaped it would have meant reengineering the entire pattern and then would lose the look I liked. Some I left it alone. I also changed the overall length of the pattern. Removing a total of 5 or 6 inches. This was done by shortening the overall length of the bottom panel. It just felt too long and the proportions were off to my eye. I also removed from length to the skirt front and back panels. These changes took the dress from looking like a big sack to something fun and fashionable! The new length makes it a perfect pairing with fall/winter boots! 

The orange infinity scarf I made last winter is a perfect addition to this outfit!

With the black ponte version muslin end and recut for a great dress I got to work on the color blocked version for then HCCC challenge. 

I used cross grain cuts of ponte cut at 1 3/4 inch strips which gave me 1/4" flat piping.  The biggest challenge was how was the piping going to work with all those seams??? I did a lot of samples and tests to see if it was going to be doable. 
In the end with a little work it all came together. In seams were piping crossed I made sure to trim out as much as possible, I used my server which amazingly went through all those layers like butter! And, as you can see in the photo above, I even took to a hammer to flatten down some of the seams. My dogs didn't particularly like that part! LOL!!

All in all I think it worked out fairly well. The seams are ever so slightly stiff when compared to the black version but nothing terrible. 

Some other ideas I played with for the black lines was to piece them. This would have required drafting an entirely new pattern. I also played with using a black jersey knit but it just felt more wonky to me. I was able to get very nice consistent seams using the ponte. 


The biggest version between the 2 dresses is on the back. The upper back panels on the black version all meet together. This was just a nightmare to try and do with the the piping! Too many layers!!! So I changed them so that they didn't all meet together. 
Details lightened up so you can see them!

This was a fun project and I will enjoy wearing the black version this winter. The color blocked will remain safely tucked in my closet until after the April Haute Couture Club of Chicago fashion show! With my luck I would spill something on it and ruin it and I don't want to remake it before the fashion show!

Happy Sewing! 

I'm looking forward to spending some time with my granddaughter this weekend! :) and maybe working on a couple of Appleton dresses... I couldn't make up my mind on which fabric, so I making two!

Monday, November 30, 2015

Sidelined by illness.... A story of acute idiopathic pancreatitis.

This month brought me a whole new scary challenge!

Several weeks ago I was on a business trip to upper Connecticut and central Massachusetts when things started going awry. On a Tuesday I was a little bit like an acid stomach so I ate a couple tums. By Wednesday I had a full on stomach ache so I started taking some Pepcid. Sometimes on business trips this can happen. You know, planes, rental cars, meetings deadlines, customer dinners, hours in the car going from here to there. By Thursday things just hurt, I didn't sleep, I was feeling a bit nauseated. Nothing I took helped and nothing really made it acutely worse. It just slowly was getting more and more painful. By the time I flew home Thursday night I was a wreck. It was the worse flight of my life. And it was about my 67th or so flight this year! My middle/upper back was spasming, I was nauseous the entire way and generally wanted to just click my heels and be home!! 

By Friday the 13th dinner time I was in the emergency room with a diagnosis of acute pancreatitis. What the hell!!! 

The emergency room personnel went from 'oh you probably just have an ulcer, here is a special cocktail to drink to make you feel better and let's get an ultrasound' to immediate concern with shots of zophran and morphine and a cat scan followed by a MRI the next day.

I was immediately admitted and from Friday night to Wednesday had nothing by mouth. And I mean nothing, not a sip of water, not an ice chip, nothing by mouth. Which actually was strangely ok with me since I had zero appetite. For me not to have an appetite, something was seriously wrong!!! I always have an appetite! For 4 days I subsisted on IV fluids, shots of morphine every 4 hours and Zophran and IV Pepcid. I had no idea that this little gland that sits tucked under your stomach could cause so much trouble! 

After a multitude of tests it turns out that they have no idea what caused my pancreas head to suddenly become inflamed and swollen. I had no evidence of cancers or lymphomas, no anatomical deformities,no alcohol abuse  no immunodeficiency issues, no gallbladder problems and never been bitten by a scorpion. Yes, they actually asked me that! 
So the fancy term for the doctors not having a clue is 'acute idiopathic pancreatitis'. 
Have to love the fancy names for we have no freakin idea!

After going for 96 hours with no food and minimal movement outside the bed they moved me to a clear liquid diet. Think water, broth, jello and that's about it. I got to do this for a day and a half. With the added bonus of let's try to take a walk. Along with a try your best not to vomit, it's bad for your pancreas. 
Getting my hair done after 6 nights in the hospital....

Long story short 7 nights later I finally made it home. I cancelled all thanksgiving plans and my hubby and I just hung out for a quiet holiday of me trying to figure out food again. I still have no appetite, am losing weight, around 16 lbs in the past 2 weeks and eating is now a chore. Something I have to do to try and keep up some energy.

During all of this I found that I have some of the most amazing friends, loved ones and coworkers. I had some of the most beautiful flowers to brighten up my hotel room and I was glad for them. I was too nauseous to read or watch TV so I spent many hours listening to podcasts and staring at my lovely flowers! I had the best visitors to help keep my mind off things! They definitely helped me through my ordeal, I don't even want to think of trying to go through that alone. My husband was amazing. He was there early every morning and all evening. 
Grand baby hugs and snuggles make everything feel better!

Now the road to recovery after an acute bought of pancreatitis can be a long one. A super strict diet of low fat and bland with no alcohol for a while and then we shall see. Right now I still don't have much of an appetite but I'm assured that this too will improve over time. I still have some lingering nausea and some mild pain especially when I lie down. 

Despite all of this I am most THANKFUL that things were not worse! Thankful that they did not find any 'bad' stuff going on. Thankful for all my family and friends who love me, sent prayers and good thoughts my way. Thankful for my life. 

Friday, November 6, 2015

I Love a great PINK dress! Vogue 1435 and all my thoughts and ramblings.

I finally got to use my coveted hot pink wool from Britex. I bought this piece when I was out in San Francisco for work last September. I suppose in the greater picture of my lovely fabric collection this one has been a fairly recent purchase! I do love to let my good fabric 'mature' for a bit before cutting into them!

Without further ramblings, here are the details.

Pattern: Vogue 1435 a Tom and Linda Platt design. I made several changes to the design, some of these were design changes and some were fitting changes.
For Design considerations of the dress. I changed the neckline of the dress to a soft, high V neck. I think next time I make this sheath I will deepen the V about an inch. I also left out the slit at the front left leg, I'm not such a big fan of them and I don't think I've ever made a skirt so tight that I actually need one for walking comfort! Although, as a design element it may be something to play around with in the future. For the lining, I eliminated the facings and lined to the edge. I used a grey ambiance  and interfaced the lining just as if it were the  actual facing. This worked out perfect! I finished the armhole edges with bias strips. I like how this finish is very clean and also feels slightly sturdy but not stiff or bulky.

If you are wondering why I choose grey lining? I took my pink wool shopping with me and I held the lining fabric behind the pink wool and observed the color changes. Even though this is a very opaque weave the color behind changed the vibrancy of the pink color. I wish I had taken pictures! I sure the shop ladies thought I was a bit crazy! Unrolling bolts of lining and holding them up to the light and turning this way and that to assess the color! The grey won out by a very large margin! The pink just popped and was so vibrant with the grey behind it! 

On the dress I made several fitting changes to fit my figure the biggest of these included adding a fish eye darts to the front side panels and changes in length to the back upper bodice area to decrease the pool of fabric at my lower back.
The darts were added after an initial fitting in the fashion fabric. I was able to pinch out the fabric and I fiddled in the mirror with my pins to figure out the placement and size. These I then transferred to the pattern. For full disclosure, on my muslin it was also decided to use either fish eye or full darts from the top of the fish eye and continuing all the way to the hem. So I knew that I had a good idea ahead of time that I would be adding in some sort of shaping in this area! I really like how these added darts make my curves look so beautiful!! It also keeps this sheath dress form looking like a potato sack on me! 

Onto the Jacket!
Design changes to the jacket included the decision to line the entire piece. I used the facing pieces for the proper weight and for the lining I lined to the hem edge. I did this by cutting the lower edge of the lining a scant 1/4 inch shorter so that once the two were stitched and turned the fashion fabric would roll to the inside slightly. I think this worked perfectly on this little swing jacket!
I also used several different fusible stabilizers on this piece. A sponged one on the back facing and a slightly beefier one on the collar. 

The fitting changes I made to the jacket were numerous! It was just a very boxy little jacket with all its laurels resting in the swinging back. 2 sets of darts were added to the front. One armysyche bust dart and an additional dart under the bust to control the fullness of the fabric. I wanted the front to be fitted and sleek and all the drama to be in the back. I could also cut the fronts on the bias which would let the fabric under the bust hang nicer. I choose not to do this with this fabric mostly because I had to squeak out the fabric. I think I was 3/4 of a yard short in what the pattern suggested! 

Back neck darts or are the upper back darts???? Hmmmm..... I'll have to look into the proper name. Either way, these back darts were added to shape the jacket nicely. I modified the collar to reflect this change. 
Speaking of the collar... I am pondering changing it to a mandarin type band collar if I make this again. Pondering, always pondering!
The biggest change on the jacket was to the sleeve! Both for fit and design. I used a 3 piece sleeve with a bias under sleeve. I am in love with this sleeve💖, I just fits like a dream and added bonus it leaves plenty of area for embellishments. Embellishments such as a faux vent with 9 vintage Czechoslokakian glass pink and gold buttons! I just happened to have a card of 25 buttons in I my stash! By faux vent I mean it just does not have any buttonholes. I sewed the buttons on through both layers of the vent opening. Vintage glass buttons to the elbow added the extra pizzazz to this outfit that I was looking for!

I order to keep the sleeve vent neat and nice I hand basted it shut before sewing on my embellishments. At this point in my project I had 2 ideas for how to jazz up these sleeves. One is a beaded trim and the other is the buttons that I used. Both looked quite nice but the buttons gave me the elegance I was looking for and now I have the trim to use for another project.... Resulting in another serious case of pondering!

Since completing this garment in September I have worn it three times in 3 weeks!!
Week one: to a wedding in Milwaukee, WI


Week two: to the ASG Chicago chapter annual fashion show.


Week 3: another wedding on Halloween, a formal wedding/masquerade. Oh my so much fun! And I have never been so glad to have a garment that fit me perfect and that was so comfortable because I danced my a$$ off that night! Here are a couple of fun photos!

My husband and I with out granddaughter.

And, below, me in my mask with a great friend!


So... Do I love this outfit???? YES!
I will be making the dress again for sure. The jacket, maybe for special occasions, it is a very distinctive look.
I do want to give a big thanks to Sarah Veblen for her fitting assistance in the muslin stage of this outfit. It is so nice to have someone to bounce ideas off of and have a brain to pick :) 

Happy Sewing!!

Thursday, October 29, 2015

And what do I do with this fabric??? I know, make a pantsuit!

One of the things I really enjoy about my ASG neighborhood group is the camaraderie and the fact that we both challenge and support each other!

For the annual Chicago Chapter fashion show y group decided to do a group challenge using a Spoonflower designer fabric. The print chosen was Entangled by Heather of Hang Tight Studio. 

My first process in this project was to order several auric samples from Spoonflower. If you have not used Spoonflower I encourage you to check it out! There are thousands of designs and you can even upload your own design. This print on demand service allows you to order as little, I believe a fat quarter, up to as much as you would like. There are quite a few fabric types, 19 in total,  that you can have your chosen design printed on. I choose to have samples printed on 3 fabric types; organic Cotton Sateen, Linen-Cotton canvas and organic Cotton Knit. The samples come in a large 8x8 swatch. Large enough to launder and really get a look and feel of the print/fabric combos. 


The challenge we set dictated that 60-70% of the outfit had to use the Entangled print. The print comes in 6 colors, grey, navy, dawn, green, light pink and blue. I choose the grey.
I had several ideas floating in my head... A wrap dress from the jersey, a tench coat from the canvas or a pantsuit from the cotton sateen. Obviously the pantsuit won out! It just fit more into what I had been sewing this spring and fall. Gave me an excuse to use my new jacket pattern, my perfected pants pattern and to play with changing up the designs on both of those. I also felt the cotton knit would not work for a dress and that the canvas was too stiff, would have needed too much prep of wash and dries to get it broken in enough.

Once I got the fabric, 5 yards in total, I decided that it would need to be underlined with an imperial batiste. This would help keep it from wrinkling too much as well as give it just a touch more beefiness. After consulting with Sarah Veblen the decision was also made to add some color to it. I really did not like the thought of head to toe print fabric. Besides, I LOVE color! So I added teal color to break up all that grey. Let me tell you I pondered and thought and daydreamed and pondered some more on how to make this happen and happen successfully. This was a long term project! I ordered my swatches in mid-June and finished my sewing in late September! 

There was a lot of work! The pants and jacket were both fully underlined. Meaning I had to cut double the number of pieces and then hand baste all those buggered pieces together. I did the pants first, they were easier of the pieces. No paint, only underlining and then hand sewing several swarski crystals to the open vent. The vent gave me a slight bit of trouble and was a bit fiddly because of the double layer of fabric. I did my test run in muslin and it came out perfect. In retrospect I should have eliminated the underlining in that area. Lesson learned for next time! 

Next up was the jacket, with the pants out of the way, I at least felt like I had something accomplished! For the jacket I cut out the fashion fabric and then added the paint. I used a silky shimmer acrylic paint for fabric and with a very small brush I very carefully filled in the white ovals. I wanted a graduated look so I carefully marked all the pieces so that the top quarter has all the ovals filled in and then the second quarter has them going from fully filled to nothing. As you can imagine just lining up all the pieces took some time. I had to paint on 13 separate pieces of fabric and very, very carefully! I had NO fabric leftover to spare if I mucked it up!! The painting was done while I was on a trip to my parents for 10 days. 
After the paining I hand basted all the imperial batiste underlining to all 13 pieces... Good thing I don't mind hand work! With that complete I decided to construct my 3 piece sleeves first. Since my sleeve pattern is adjusted to fit me exactly I could complete the sleeves and totally finish the hem and working 3 button vents while they were flat. As you can see in the picture below I used a teal China silk for a Hong Kong finish.
To keep a sleek look I decided to use covered buttons. This was my first time ever using covered buttons. I bought a kit at my local shop and sort of followed the directions. To make them feel more substantial and avoid shine through I first glued a piece of batting to each button. I also put a bit of glue inside each piece before attaching the backing. They came out lovely!!! I even made a couple extra for my button stash in case I ever lose one from my garment.

With that done the rest, well almost the rest was easy peasy! 
The main construction and the hong Kong binding all went together nicely, of course I took my time, no rushing on this kind of project! 
The hardest part was the collar. I drafted 2 different collar shapes for this jacket. Both are shawl collars. The one I didn't use had points to the side versus this more traditional style. 
This one just looked problem was that I was really stuck on which fabric to use and what kind of treatment. I really, really wanted a textured collar. So I took a couple hours and played with 2 different fabrics and several texture techniques. In the end I opted to use the teal tissue taffeta and I sewed multiple lines of stitching in a longer stitch and shirred it. While pulling up the threads I also used this to help shape the collar. The back is more loosely gathered and the points near the jacket are more tightly gathered. Once I had this done I sewed it to the muslin piece and trimmed it to the correct size. Then I applied some of the shimmer paint along the shirring. I think this treatment turns out lovely and the silk collar feels cool against the back of my neck. 
The tissue taffeta is a fun fabric and the iridescent properties of it really change depending on the lighting.

The hem and the inside facings were all done by hand... More handwork. I think it just looks better that way! I also added a handy inside pocket for tissues or a piece of candy. I like to add my inside pockets near the lower edge so that if I have anything in it it does no look lumpy on my chest.
Can you see the pocket? It blends right in!

It was really a lot of fun to model this outfit on the runway!
I did also make a tank to wear underneath. That fabric was a polyester silky and after sewing with the silks and lovely organic cotton sateen it just felt not quite as nice. 

Here is a shot of my sewing friends with their creations as well. Photo courtesy of Wendy Grossman.
I would have preferred different shoes but had a real hard time finding grey in the right tone to match... I'll have to keep my eye out for a pair of teal flats! 

This project was one heck of a labor of love! Luckily I think the print is close enough to a stripe that I can wear it for work, spice things up a bit!

I'd like to say that after this project I moved onto something a bit easier.... But no, not me! I needed a fancy dress for 2 weddings and so I aLao entered that into the fashion show. I figured if I really had a committed deadline that I would make sure to get it done :)

Stay tuned for next post of my pink wool dress and jacket.

Happy sewing!
And of course, a picture of my beautiful grand baby!