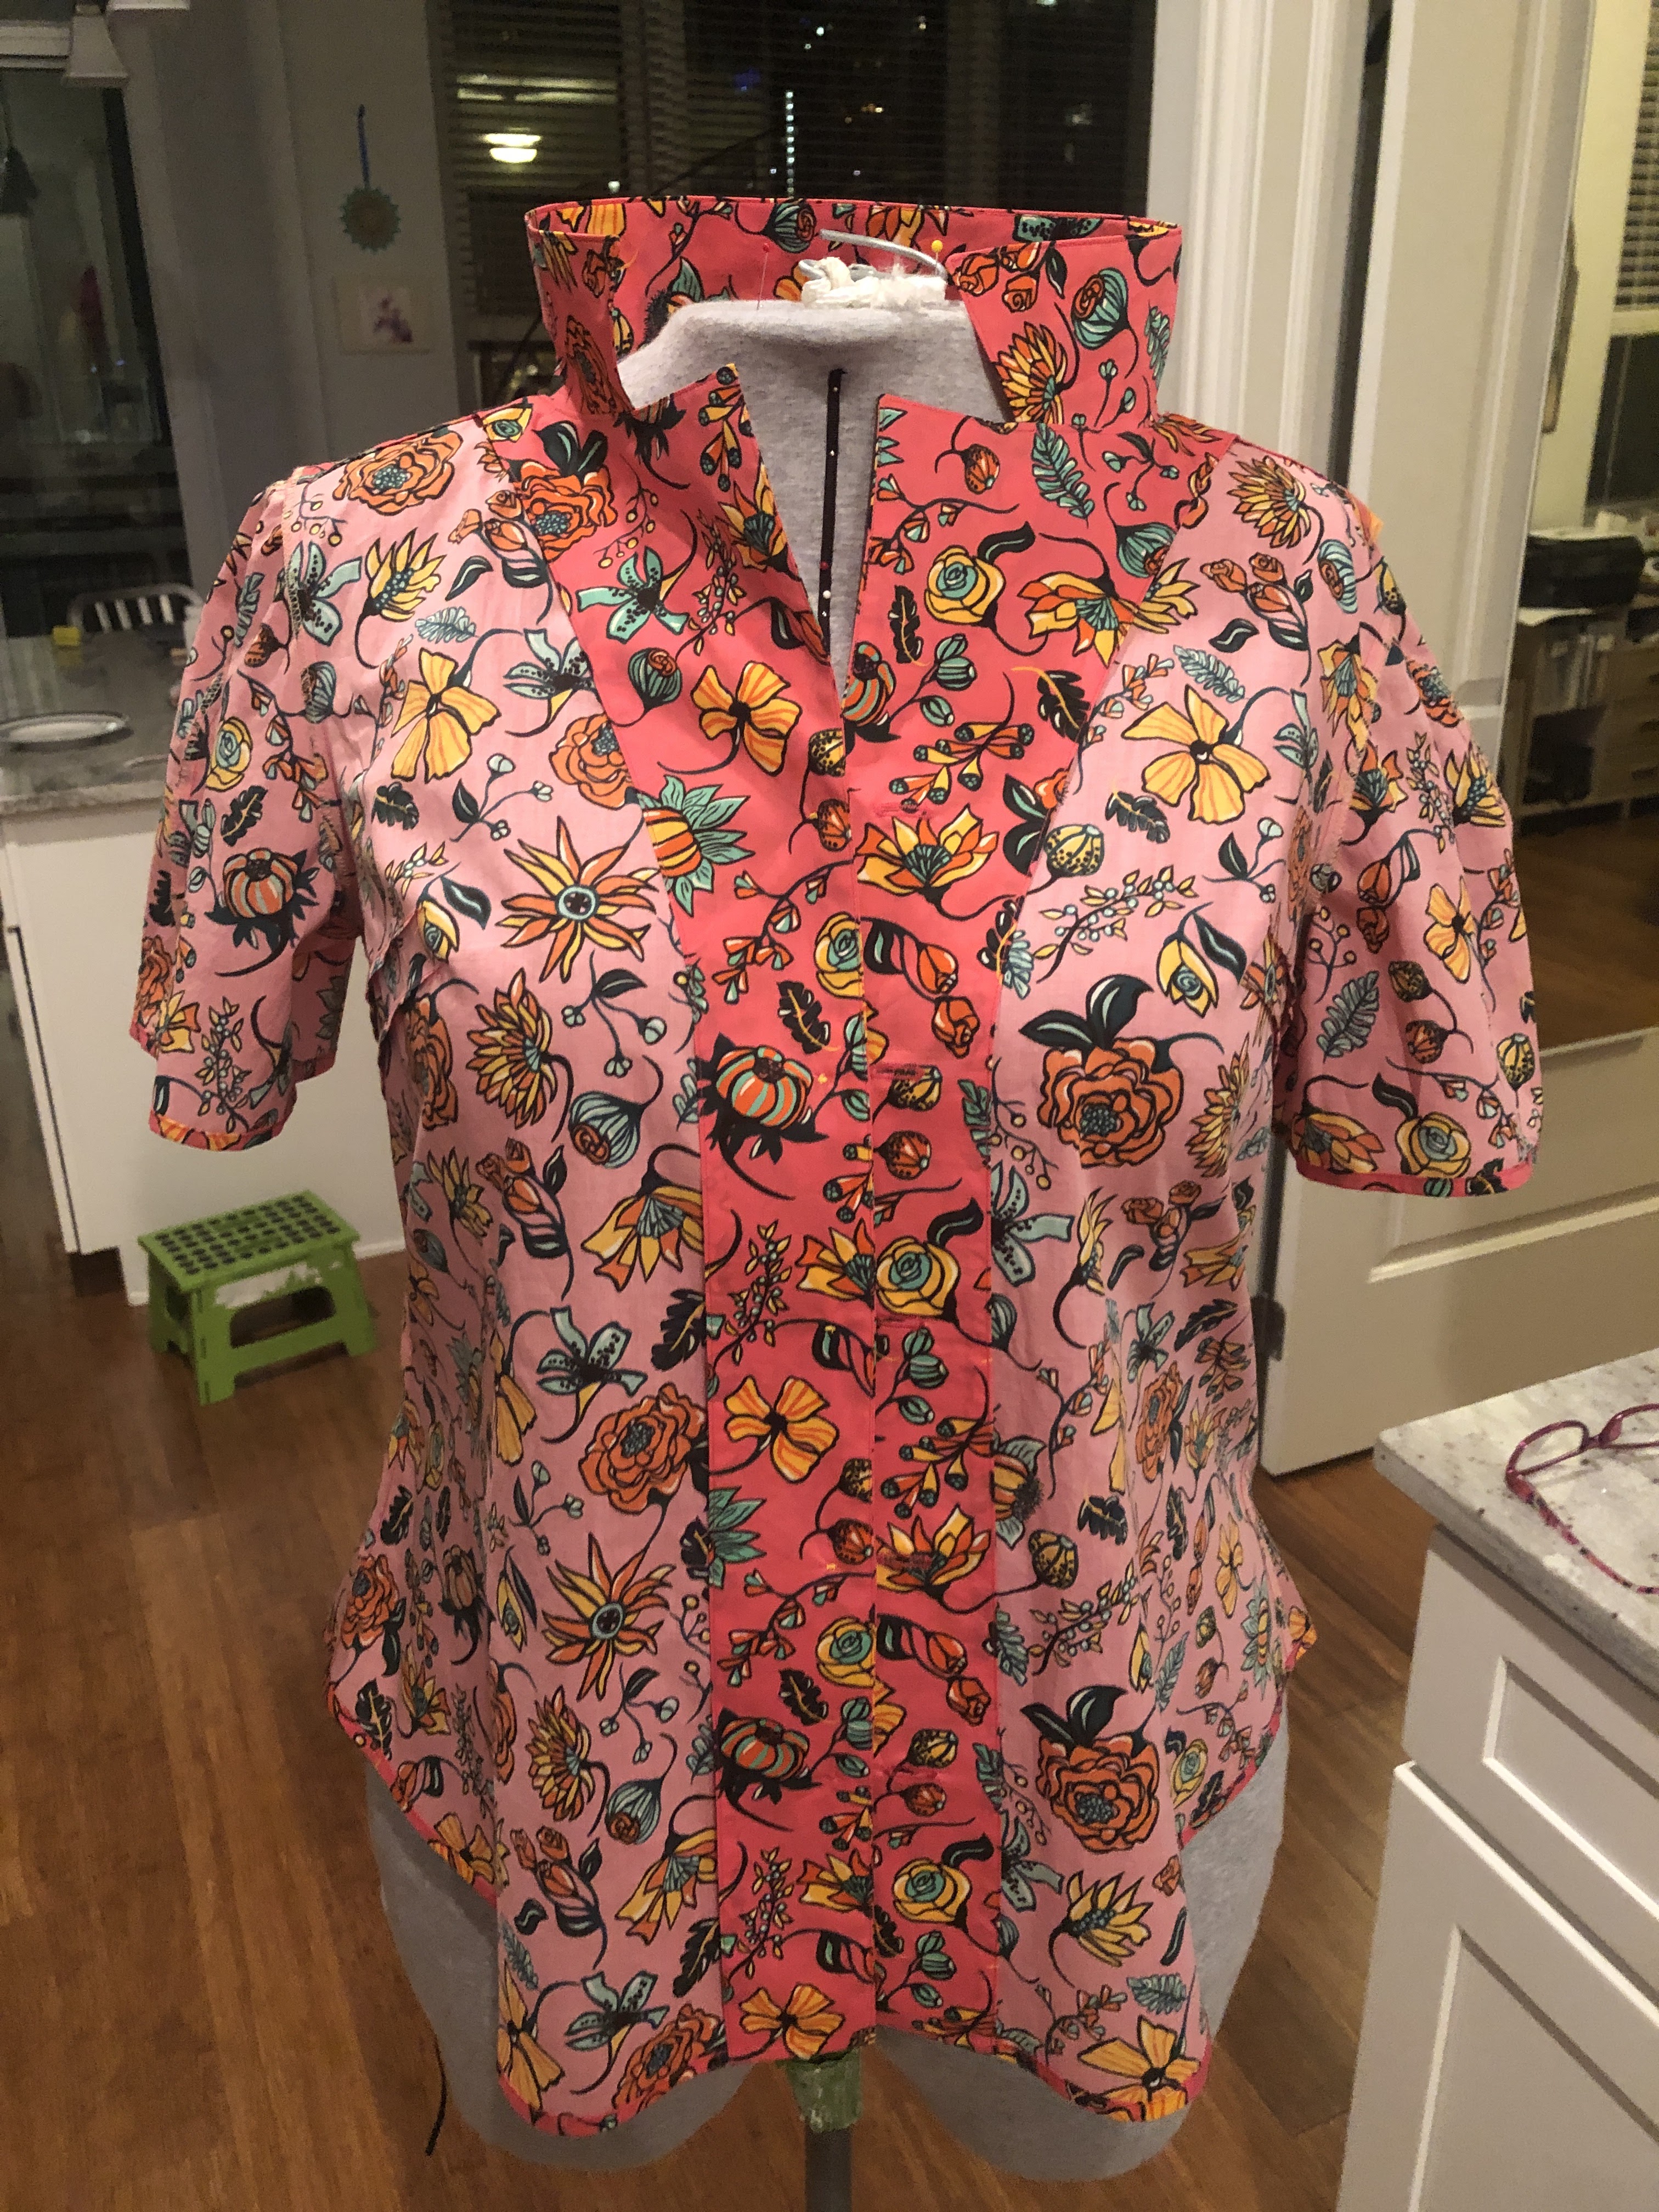
I am an active member of the American Sewing Guild and belong to
the Chicago Chapter. Chicago chapter does several hands on workshops each year and this
year the education team was able to quickly switch from in-person workshops to
online virtual alternatives.
We were scheduled to have an all-day in-person sewing workshop on
making camp shirts. Due to the pandemic this was switched to a virtual 2-hour
presentation. Not quite the same as spending the day sewing with your friends
but it was a great alternative. The team gave a presentation on the history of
the Camp Shirt, a trunk show of sewn and created camp shirts, overview and
comparison of available patterns and great construction tips along with video
clips.
I was definitely inspired by this presentation!
Using New Look pattern #6197 as a jumping off point I dove into
my first creation. I say jumping off point with this pattern because I did not
actually use the pattern itself. I used it to evaluate the pattern pieces so
that I could modify my master darted bodice pattern and easily turn it into a
camp shirt pattern.
SO what exactly did I do?
- traced
off a copy of my master pattern on pattern paper and used this traced copy to
modify.
- I
moved my shoulder seam to the front by 1 inch.
- Used
the neckline shape from NL #6197
- My
master pattern has double darts which make my fit perfect.
- Modified
length on bodice for a shaped hemline
- Used
NL #6197 to get depth of back yoke
- Rotated
my back shoulder dart into the yoke seam
- Eliminated
the back fisheye darts
- Moved
back to be cut on fold with pleat depth from NL #6197
- Drafted
a collar from scratch using the height of the collar and collar point shape
from NL #6197 but drafted with my measurements.
- Drafted
a separate under collar on the bias with a CB seam and 1/8” smaller to favor
the seam to under collar.
Fabric
- combination
of 2 fabrics
- The
floral montage fabric is an Italian cotton lawn that I purchased from Michaels
fabrics in Baltimore. It is lovely!! But, I only had 1 yard of the 60 inch wide
fabric. Not enough for the entire shirt and this orphan fabric has been hanging
around for several years.
- The
striped floral lightweight cotton fabric was purchased in Hong Kong and pairs
perfectly with the Italian fabric both in color/print and weight.
Interfacing
- I
tested and decided to use Islander Sewing Systems Shirt Maker’s Choice. This is
a fusible woven cotton interfacing.
- I
interfaced the front facings and only the under collar.
- On
the test pieces that I thought this was the best to use. After full
construction it turns out that this interfacing is a little too much for the
lightweight cotton I used. Next time I will switch to something lighter.
Buttons were from my button collection and were harvested from an
old RTW shirt several years ago.
Seam construction and finishes
- all
seams done on my sewing machine with Gutterman all-purpose thread, size 80
universal needle, 2.5 mm stitch for construction and edge stitching
- Enclosed
seams trimmed with pinking shears
- Exposed
internal seams finished with 3 thread overlock narrow stitch
- Hems-
narrow hem totaling a 1/2 inch. I first stitch a 1/4 inch. Press this up on the
stitching and then press up again and edge stitch.
Some of the tips and tricks that we were given
in the
presentation were the following:
1- They provided a basic list of sewing construction order that
was very helpful and was done to give us a no hand sewing method of completion.
2- sewing the fusible interfacing to the facing then turning and
fusing to have a very smooth finished edge. This is a nice finish and with the
woven interfacing I used was fairly easy to do. After sewing, turning and
fusing I also edge stitched the long finished edge.
2- Using the ‘burrito’ method to easily sew and finish the back
yoke. This is super easy to do and very easy to turn.
3- good clarification on how to finish the shoulder seam using
stitch in the ditch or edge stitching.
I used the handy order of construction list and modified it
slightly and added to it to make it comprehensive and printed this out to put
in with the pattern pieces so that I have an easy instruction guide to go along
with my new pattern pieces.
This camp shirt is quite easy to construct. There is no separate
button placket, the pockets are optional and I left them off this version. Once
the pattern pieces are cut out you can easily have this sewn together along
with top stitching in several hours.

Technically this version is my wearable muslin. A very wearable
version since I used my master pattern to create the pattern. The only issue
that I ran into was with my sleeve.... The sleeve that I use and like best is a
2-piece sleeve with an outer seam that normally matches up to the shoulder
seam. Well, I totally forgot that I moved the shoulder seam forward by 1 inch
so my sleeve seam and my shoulder seam do not match. At least they are off by
an inch so not like it is off by just a little. I did think about removing the
sleeves, adjusting the pattern and recutting them but decided in the end that since
this was a wearable muslin that I was going to leave it and be okay with it
being imperfectly imperfect. Plus I had no more fabric!
This shirt is easy breezy, super cute and great to wear on hot
and sticky Chicago summer days!
Of course due to the ongoing pandemic I used the scraps that I
had leftover to make 2 masks. One mask I will keep and use when I wear this
top. Matching masks is all the rage right now!
The extra mask will go into my mask donation pile. Win- win in my
book! The scraps are used and someone will get a mask to help keep them safe.
Happy Sewing!
The Princess sends big smiles to everyone!! She was so happy to have an overnight with me after such a long time :)